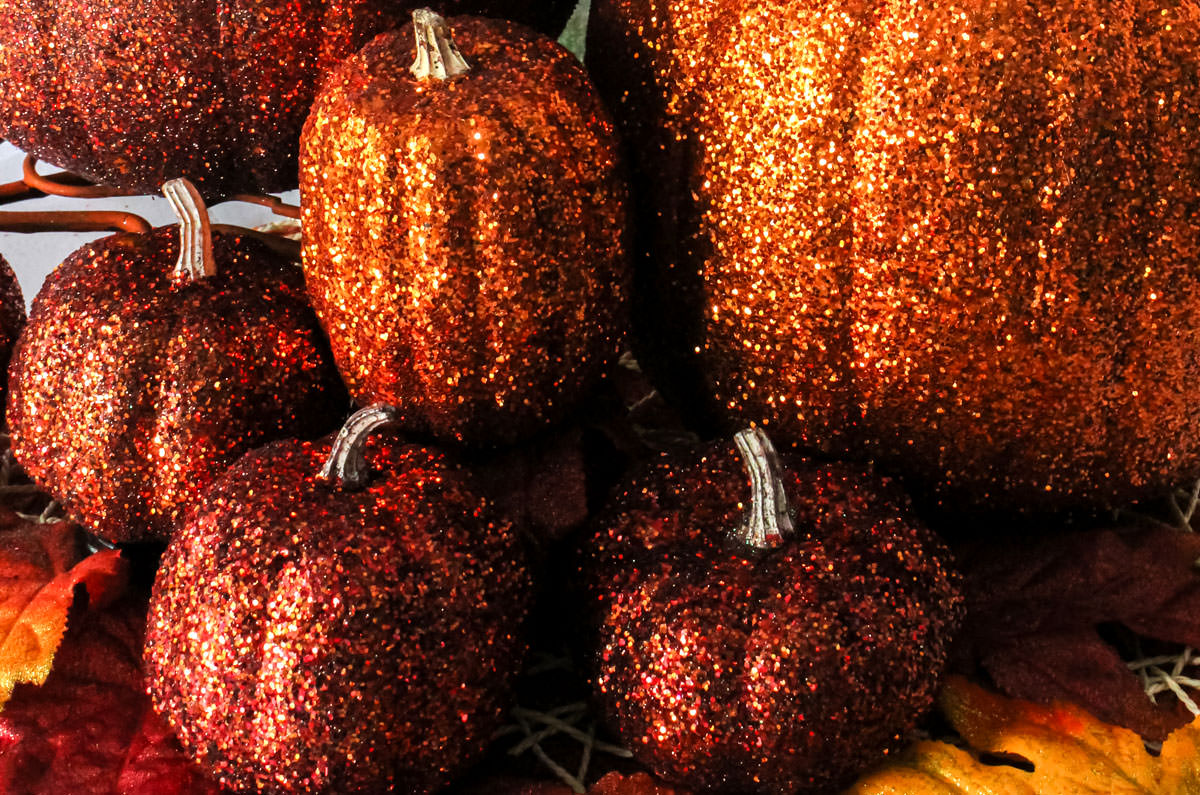
Brighten Your Fall Decor with Inexpensive DIY Rainbow Glitter Pumpkins
Fall is a season synonymous with warmth, rich colors, and cozy vibes. While the traditional palette of oranges, browns, and deep reds has its undeniable charm, who says you can't infuse a burst of unexpected, vibrant color into your seasonal decor? This year, ditch the conventional and dive into a dazzling DIY project that promises to make your home sparkle: **diy rainbow glitter pumpkins**. Imagine a collection of glowing, neon-hued pumpkins shimmering on your mantel, coffee table, or even lighting up a dull corner of your home office. This isn't just a craft; it's an invitation to joy, color, and a touch of magic that's both budget-friendly and incredibly fun to create.
Whether you're gearing up for Halloween or simply want to extend the festive spirit through Thanksgiving, these
Rainbow Glitter Pumpkins are a fantastic way to add a personalized touch. They’re super simple to make, require minimal supplies, and offer an exciting opportunity for crafters of all ages – even the littlest hands!
Why Embrace a Spectrum of Sparkle This Fall?
Breaking away from the traditional fall color scheme isn't just about being different; it's about embracing a broader spectrum of joy and creativity. Neon and rainbow colors have a unique ability to uplift spirits and add a playful energy to any space. While Halloween typically conjures images of spooky blacks and classic oranges, integrating bright, shimmering hues can transform your decor from rustic to whimsical, from subtle to spectacular.
One of the greatest benefits of embarking on a **diy rainbow glitter pumpkins** project is its incredible versatility. These glittering beauties aren't confined to a single holiday. You can display them from the end of August, celebrating the arrival of cooler weather and pumpkin spice everything, all the way until your Christmas decorations make their grand appearance. They make fantastic centerpieces, delightful accents on bookshelves, and even thoughtful, handmade gifts for teachers or friends. Plus, compared to store-bought specialty decor, creating your own is incredibly inexpensive, allowing you to achieve a high-end look without the hefty price tag.
Gathering Your Gleaming Gear: What You'll Need
One of the joys of this craft is that you might already have most of the supplies lurking in your craft cabinet. If not, everything is readily available at local craft stores, dollar stores, or even your neighborhood farmer's market for the pumpkins themselves.
Here's a comprehensive list to get you started on your journey to dazzling **diy rainbow glitter pumpkins**:
*
Pumpkins:
*
Real Munchkin or Mini Pumpkins: These small, natural pumpkins are perfect for an authentic fall feel. They're inexpensive and can often be found at farmers' markets or grocery stores. Just ensure they are clean and dry.
*
Faux Craft Pumpkins: Ideal if you want your creations to last year after year. These come in various sizes and are usually lightweight. They might have removable stems, which can make painting and glittering easier.
*
Adhesive:
*
Mod Podge (Matte or Gloss): This is the go-to for many crafters. It acts as both a glue and a sealer. Its consistency is perfect for spreading.
*
White Craft Glue (e.g., Elmer's Glue): A good, accessible alternative, especially for kids' projects. May require a slightly thicker application.
*
Spray Adhesive: For a quick, even coating, but can be messier and requires good ventilation.
*
Glitter:
*
Neon or Rainbow Glitter Assortment: This is where the magic happens! Look for fine glitter for a smooth finish or chunky glitter for extra sparkle and texture. An assortment of bright pinks, blues, greens, yellows, and purples will bring your rainbow vision to life.
*
Iridescent Glitter: For an extra ethereal glow.
*
Tools & Protection:
*
Small Paint Brushes or Foam Brushes: For applying the adhesive evenly.
*
Paper Towels or Sponge: For dabbing glue and spreading.
*
Newspaper, Drop Cloth, or Old Tablecloth: Absolutely essential for protecting your workspace! Glitter has a way of migrating everywhere, so covering a wide area is crucial.
*
Disposable Plates or Shallow Trays: To catch excess glitter and make cleanup easier.
*
Optional: Clear Acrylic Sealer Spray: To minimize glitter shedding and protect your finished pumpkins, particularly if they’ll be handled frequently.
*
Optional: Acrylic Paints: If you want to paint your pumpkins a base color before applying glitter, especially if using a lighter glitter on a darker pumpkin or for creating specific designs.
Your Step-by-Step Guide to Dazzling DIY Rainbow Glitter Pumpkins
Creating your sparkling pumpkins is a straightforward process that’s more about fun than precision. Here’s how to do it:
1.
Prepare Your Workspace: Lay down a generous amount of newspaper, a drop cloth, or an old tablecloth. As the reference context warns, "Yes, there’s glitter involved... it’s going to get messy." This step is non-negotiable!
2.
Prep Your Pumpkins: If using real pumpkins, ensure they are clean and dry. If using faux pumpkins, you might be able to remove the stems for easier application; otherwise, work carefully around them. If you plan to add a base coat of paint (e.g., matching the glitter color or a contrasting hue), do this now and let it dry completely before proceeding.
3.
Apply the Adhesive: Place a pumpkin on your prepared surface. Using a small paintbrush, foam brush, or even a piece of paper towel, apply a thin, even layer of Mod Podge or craft glue to a section of your pumpkin. Don't apply glue to the entire pumpkin at once, as it might dry before you get to the glitter. Work in manageable sections.
4.
Sprinkle on the Glitter: Hold the pumpkin over a disposable plate or tray to catch excess glitter. Gently sprinkle your chosen glitter generously over the glued section. You can roll the pumpkin gently in the glitter for full coverage. For a "rainbow" effect, you can either use different colors on different pumpkins, create vertical stripes of different colors on a single pumpkin, or even attempt an ombré blend from one color to the next. Remember, a little goes a long way, but don't be shy with coverage!
5.
Cover Completely: Ensure all glued areas are covered. Don't forget the bottom of the pumpkin! Once a section is done, move to the next until the entire pumpkin is coated in dazzling glitter.
6.
Let Them Dry: Carefully place your glitter-covered pumpkins on a clean, non-stick surface (like parchment paper or waxed paper) or back on a fresh section of newspaper. Allow them to dry completely for at least 30 minutes, or longer if your glue is thicker. Mod Podge can sometimes feel dry to the touch but still be tacky, so err on the side of more drying time.
7.
(Optional) Seal the Sparkle: Once fully dry, you can apply a clear acrylic sealer spray over the glitter. This helps to set the glitter, reduce shedding, and give your pumpkins a more durable finish. If using, spray lightly in a well-ventilated area and let dry.
Pro Tips for a Flawless Finish & Fun:
*
Kid Involvement: This is an easy craft to do with kids and toddlers! They will absolutely love helping you roll the pumpkins around in the glitter. It's also a fantastic sensory activity for them to learn their colors. Just be prepared for extra mess and embrace the imperfections – those are often the most cherished creations! For more ways to include your little ones, check out this guide on
Quick & Easy DIY Glitter Pumpkins: Perfect Halloween Craft for Kids.
*
Minimize Mess: Besides newspaper, consider doing this craft outdoors if the weather permits, or within a large cardboard box to contain the glitter fallout.
*
Layering Glitter: For extra dimension, you can apply one color of fine glitter, let it dry slightly, and then add a light dusting of iridescent or chunky glitter over the top.
*
Color Pairing: Don't be afraid to experiment! Pair a bright neon pink with a shimmering gold, or a deep blue with an electric green. The "rainbow" aspect truly comes alive when you create a collection of diverse, colorful pumpkins.
*
Q-Tips for Details: If you're going for a more "pro" look, you can use Q-tips to create polka dots or more intricate designs with glue before sprinkling glitter.
Sparkle & Showcase: Creative Ways to Display Your Glitter Pumpkins
Once your **diy rainbow glitter pumpkins** are dry and sparkling, it's time to show them off! Their vibrant hues and festive glitter make them versatile decor pieces for almost any room:
*
Enchanting Tablescapes: Arrange a cluster of varying sizes and colors as a centerpiece for your dining table or coffee table. Add some fall leaves, battery-operated fairy lights, or small faux gourds for extra texture.
*
Mantel Magic: Line them up across your fireplace mantel for an eye-catching display that draws the gaze and brightens the entire room.
*
Welcoming Entryways: Place a few on an entryway table or console to greet guests with a burst of color and sparkle.
*
Personalized Rooms: Let your kids decorate their own rooms with their handmade glitter pumpkins. My own children loved placing theirs in their bedrooms, taking immense pride in their creations.
*
Office Oasis: Even your home office can benefit from a pop of color! A small glitter pumpkin on your desk or a shelf can add a cheerful touch to your workspace.
*
Thoughtful Gifts: These personalized, handmade pumpkins make excellent gifts for teachers, neighbors, or friends. They’re a unique and heartfelt way to share the fall spirit.
Get ready for the compliments! Your friends will undoubtedly ask where you found such unique and beautiful fall decor, and you'll have the satisfaction of saying, "I made them myself!"
Conclusion
Embracing the **diy rainbow glitter pumpkins** trend is more than just a craft; it's an opportunity to infuse your home with personality, playfulness, and a unique sparkle that breaks from traditional fall decor. This inexpensive, easy, and incredibly fun project is perfect for crafters of all skill levels, offering a wonderful way to engage children in a sensory activity while creating cherished decorations. So gather your supplies, spread out that newspaper, and prepare to transform ordinary pumpkins into extraordinary, shimmering masterpieces that will brighten your home throughout the autumn season. Get ready to dazzle and delight with your vibrant, handmade creations!